Living in West Kilbride on the Ayrshire west coast of Scotland does mean that we can experience all the weather in one day.
I've always been one for wrapping up warm and grabbing a scarf when I go out especially in the Autumn and Winter.
However, walking along the beach wearing a scarf can prove tricky at times as it can get windy and you can end up battling with your scarf if it's not anchored down.
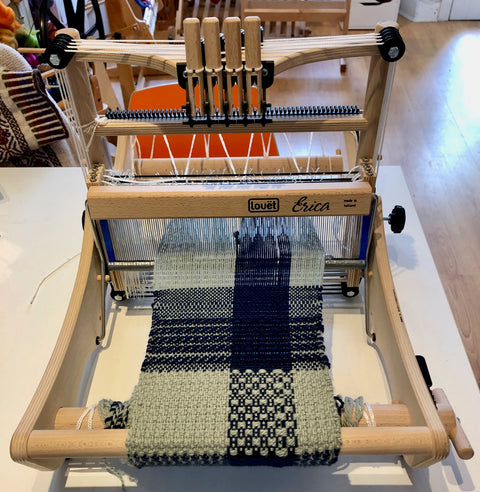
So, when I started weaving and got interested in all the patterns out there I fell in love with the Möbius Cowl pattern that was shown by Nickolena on the Weaving in the Saori Way Group on Ravelry. There was a Flickr slideshow showing you how to make this cowl on a rigid heddle loom and I followed that and made my first cowl that used my own handspun yarn and bits and bobs of stash yarn back in January 2012.

The design of the cowl means it is fully woven in one piece and this is done by taking the cloth off the loom near the end of weaving and then weaving the beginning of the cloth into the end of the cloth (this will make sense later).
My family liked the idea of the cowl so I started to make them one each. And then I started to make some more to sell at craft fairs and people seemed to like them.
I then went to college to do my HNC in Contemporary Constructed Textiles and after that I had set up Weft Blown and started to sell more cowls, as well as other handwoven items, and sell them wholesale to trade customers as well as to the public.
Here's some I wove earlier.
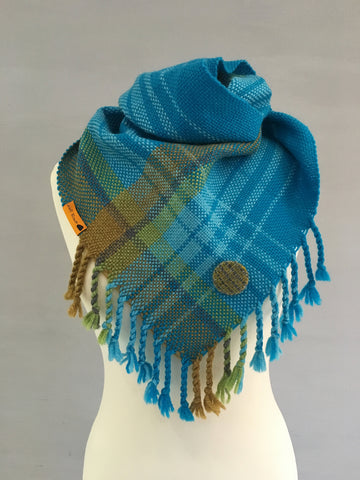
Dunes Cowl Handwoven by Ange at Weft Blown
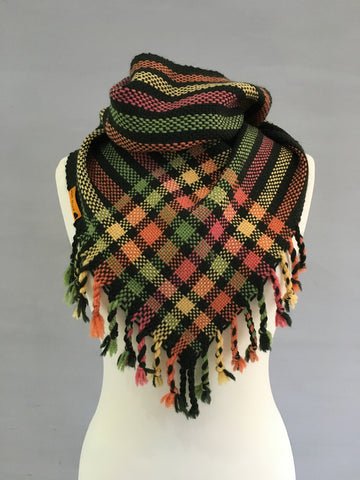
Autumn Leaves Cowl Handwoven by Ange at Weft Blown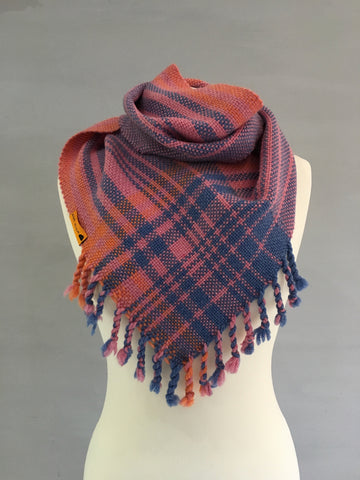
Sunset Cowl Handwoven by Ange at Weft Blown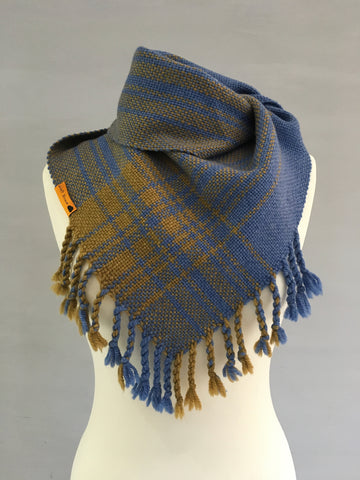
Beach Cowl Handwoven by Ange at Weft Blown
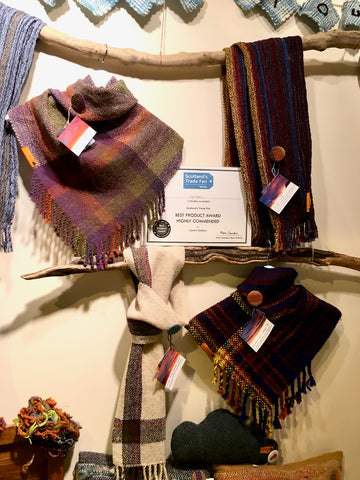
I even got a Highly Commended Prize for my Cowls at Scotland's Trade Fair in 2016 when I first exhibited there.
The main reason I love cowls is the way that the warp yarns intersect each other when they join together to make the main front piece. You can really play with colour, stripes, squares and rectangles in the design for this and it's easier than having to repeat a pattern for a whole scarf.
The structure and the shape is also a lot of fun as it's great to weave something that is 3-Dimensional straight off the loom without any sewing.
Another good reason I love them is that I am asthmatic and wearing the cowl is really good on a cold day as I can pull it up in front of my face and it keeps the air warm when I breathe in which helps my lungs.
The Dunes, Autumn Leaves, Beach and Sunset Cowls above were all woven using John Arbon Knit by Numbers yarn. This 100% Organic Falklands Merino is so soft and is strong to weave with. Also the colour range is brilliant too.
As I had already used it for weaving this is why it was one of the first yarns we got in for Weft Blown when we expanded our range.
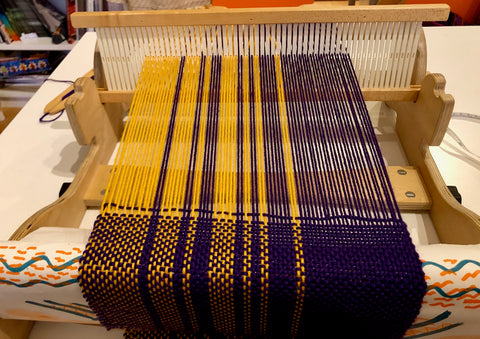
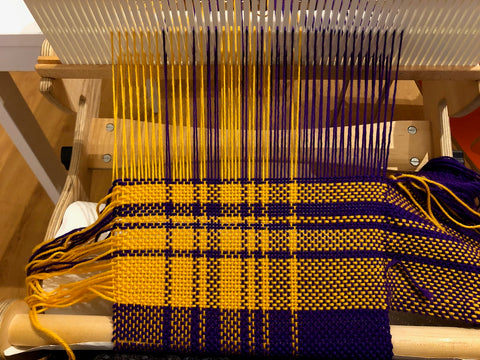
I decided then that this would be a perfect yarn to do our first cowl pattern in and this time I've used a Purple and Yellow colour way. The reason for this is I love how they look together, and it also looks quite heroic, hence the name Hero Cowl.
As always, the pattern is totally free on here and you are welcome to use any yarns you like. I recommend a Double Knit weight yarn in 2 contrasting colours.
You can also buy the kit on our website here.
Hero Cowl Weaving Pattern
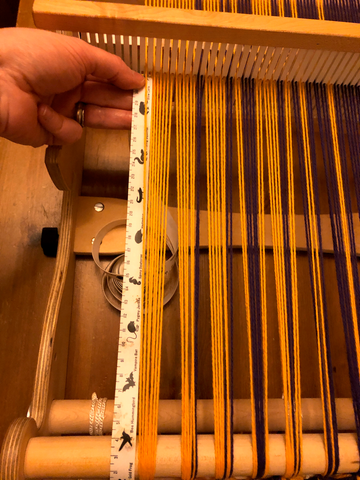
Reed: 7.5 or 8dpi Rigid Heddle Reed
Weaving width in Reed: 25cm/10"
Warp Length: 2.3m/7’6"
Total Number of Warp Threads: 78
Yarn: John Arbon Knit by Numbers DK in:
1x100g skein in KBN25 Purple
1x100g skein in KBN49 Yellow
Warping Instructions:
Thread your loom in the following colour order with the number being a single warp thread.
| KBN25 Purple | - | 2 | - | 2 | - | 4 | - | 2 | - | 2 | - | 6 | - | 26 |
| KBN49 Yellow | 14 | - | 6 | - | 2 | - | 6 | - | 2 | - | 2 | - | 2 | - |
Weaving Instructions:
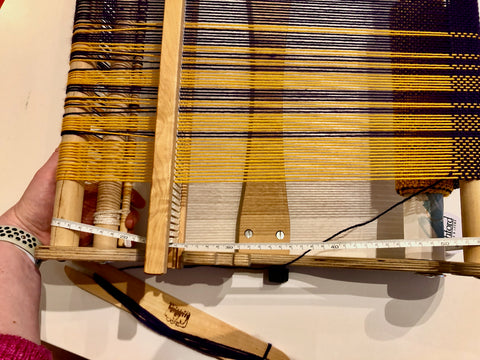
Before you start to weave wind on a 12”/30cm length of the warp yarn onto the cloth beam.
Now start weaving using either the purple or the yellow as the weft.
The weft stripes can be as big or as narrow as you want them to be. You can also weave the stripes following the warping order too. Remember that this is your cowl that you are weaving so feel free to make it your own.
Do make sure that you are not beating too hard and also that you start the next colour to the opposite side of where you finished the last colour. You can tuck in the yarn ends and if you do it on opposite sides it stops the weft yarn bulking up on one side.
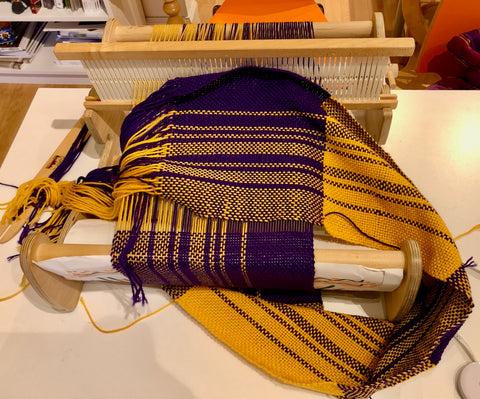
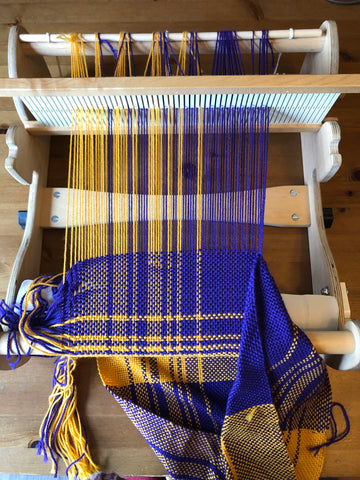
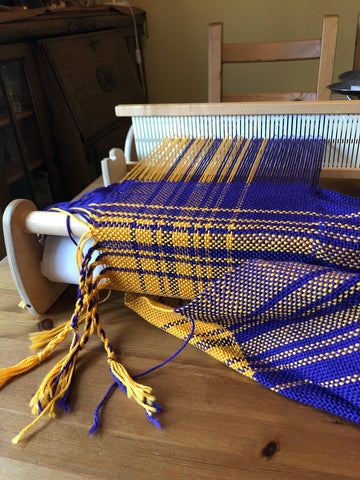
Weave until there is 50cm/20" left in length between your last row and the apron rod on the warp beam (the piece of wood you tied your warp around when warping up your loom).
Release the brake from the cloth beam at the front of the loom and unwind and untie the cloth from the cloth apron rod.
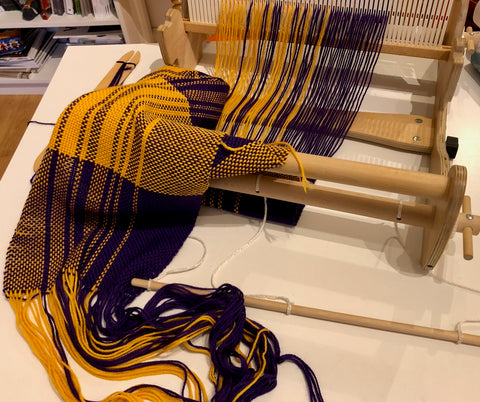
Fold the cloth so that there is about 30cm of cloth to the last row woven to the fold line.
Lie the cloth back over itself with the beginning of the woven section hanging down off the back of the loom.
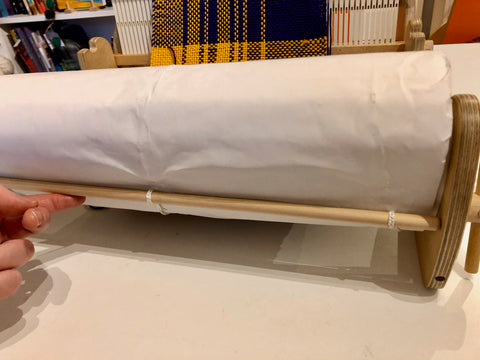
Place paper on either side of the cloth at the fold point and anchor it back onto the cloth beam using the apron rod to hold it. Basically the cloth is sandwiched between the paper. This can be fiddly so do take time with this.
Move the cloth on top to see if the last row woven is straight. If not readjust the winding on of the cloth.
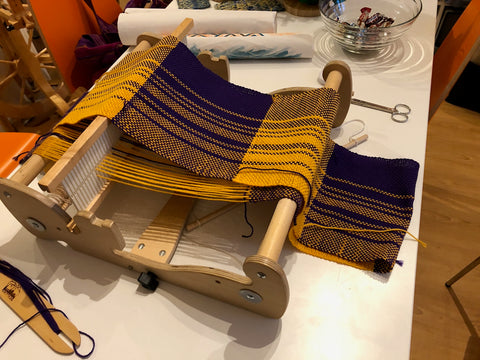
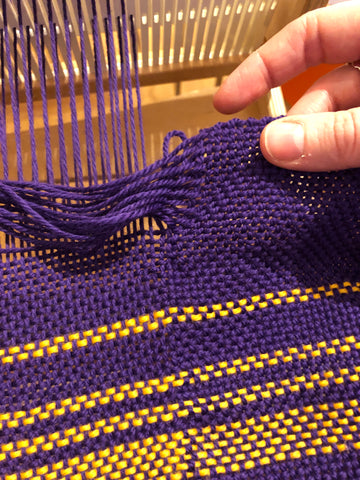
Once all is straight twist the cloth so that the beginning of the cloth is now sitting to the right of the loom. The right hand side of the warp pattern should be nearest to you and the left hand side should be near the heddle.
Using your hands take the first warp thread from the beginning of the cloth and place it through the next shed of the weave. Beat as normal.
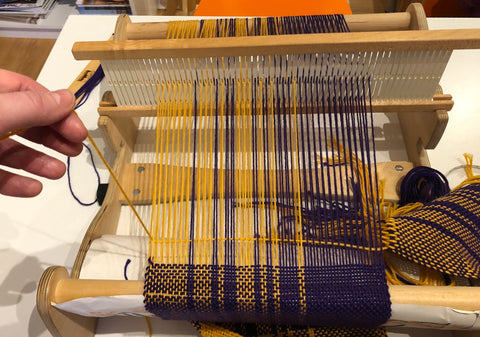
Take the next thread and do the same.
Repeat again for all of the rest of the warp ends and ensure that the warp threads are lining up with the already woven cloth and not been beaten down too much. Wind on gently when needed.
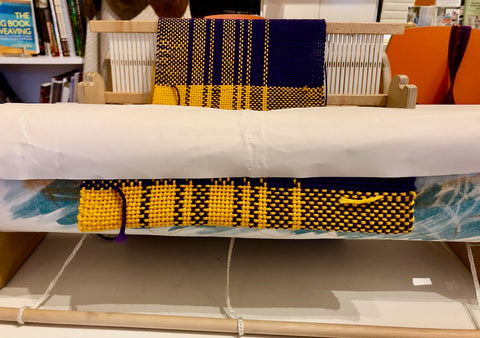
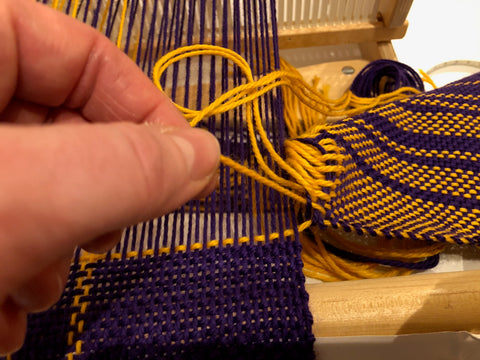
As you get near the end you may find that the warp ends have been bunched up by the first row of the weft. Gently loosen this weft thread to allow the warp threads to move.
Once all the warp ends have been woven in you can then hand twist or use a fringe twister to make a fringe along the side. This helps to anchor in the side and you can neaten it up and align the thread with the cloth while doing this.
To fringe twist with your hands gather one bundle of 4 threads and twist them between your fingers in the direction of twist of the yarn until it looks tightly twisted.
Whilst not letting go of the first twisted bundle do the same again with the next 4 threads.
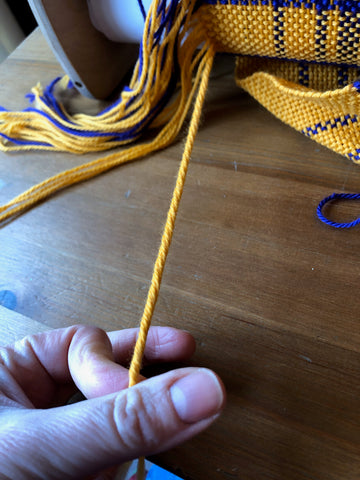

Then holding them both together release the twist back and the should twist together. Tie a knot in the bottom to hold them together.
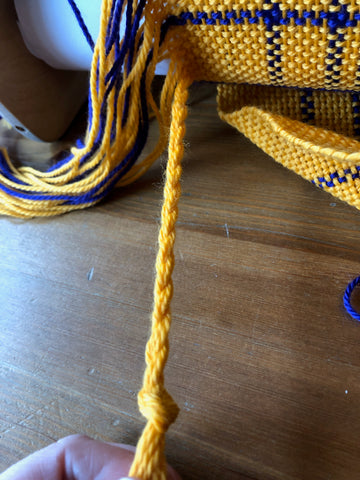
The final bundle for the fringe will be 3 and 3 threads.
Cut off the warp from the back beam and fringe twist the ends again.
You should now have a cowl/circular scarf that has a single twist in it. The twist helps the cowl to lie nicely on your neck.
You can wear it draped loosely over your shoulders.
Or my preferred option is to twist it once over your head so it stays snugly on whatever the weather.

Feel like a hero for mastering this technique and I hope it inspires you to make more of your own. If you do please tag us #weftblown on social media as we'd love to see it.
If you need help with this pattern or have any questions to do with it then you can email us at info@weftblown.com.
The pattern is made available for personal use only.
©Weft Blown 2020