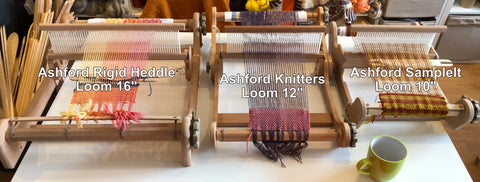
Whether you're a rigid heddle weaver or just someone intrigued with patterns in weaving, the fun things you can do with a table loom does become tempting at some point.
A table loom is different from a rigid heddle loom as instead of having a rigid heddle reed with slots and eyes that the warp threads go through (see our last blog post about what these words mean) you have instead individual heddles that the warp thread goes through on different shafts.
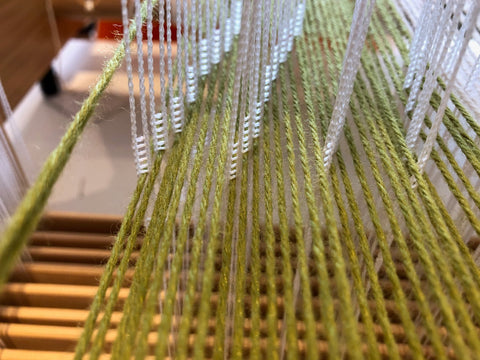
Warp yarn going through individual heddles on each shaft
This means that you can have much more freedom with patterns as you can thread the warp threads in different patterns through the heddles for each shaft.
More pattern choices can then be made by which shaft is then lifted up on the loom.
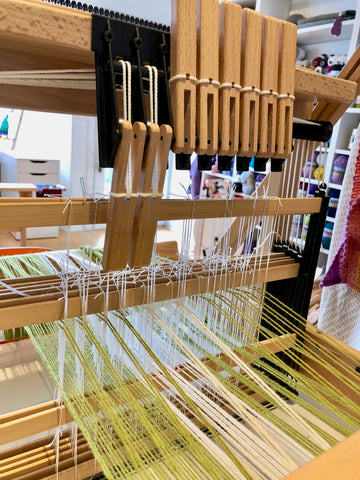
Shafts 1 and 2 only lifted while the rest of the shafts stay down
So instead of using a rigid heddle loom where alternating threads are up and down, on a table loom you can have 2 threads up and then 6 down and so on.
This opens up a massive range of patterns that you can now have at your disposal and the more shafts you have on your loom the more complex patterns you can weave.
Now, the main thing that can put someone off from weaving on a table loom is warping it up. Warping up a table loom is more time consuming than for a rigid heddle loom as you have to spread and wind the warp onto the warp beam, thread the warp yarn through the heddles and then thread the yarn through the reed.
Thankfully there are great resources online to help you get your loom set-up and we recommend checking out Ashford's videos
These videos are a really good helpful way to walk through the process of warping up your loom. You don't have to do it all at once and it really is worth taking your time to do it, especially winding the warp onto the warp beam as getting the tension even at this point will help your weaving later.
I like warping up a loom as it helps you to get a good feel for the yarn and helps to focus your mind on the pattern you're going to be weaving.
At the table loom class I run at our shop I get our students to thread up their looms with a straight and point threading. This makes you see how the difference in the threading can make on the patterns when raising the shafts.
To read a threading diagram, which are usually printed horizontally in patterns, each row relates to 1 shaft on the loom and a filled in square means that you thread 1 warp yarn through the corresponding heddle on that shaft.

Threading Diagram for 4 Shaft Sampler
In the diagram above the bottom row is shaft 1, the next row up is for Shaft 2, the row above that is Shaft 3 and the top row with squares is Shaft 4. The very top row with the shaded/white rectangles relate to which colour of yarn to thread through the heddles and as there's only 2 colours for this then the black rectangle is for colour 1 and the white rectangle is for colour 2.
Where you see a coloured in square on the rows means that a warp yarn is to be threaded through a heddle. Reading left to right you would thread one warp yarn through a heddle on Shaft 1, then one warp yarn through a heddle on Shaft 2, one warp yarn through a heddle on Shaft 3, and one warp yarn through a heddle on Shaft 4. The pattern then repeats for 3 times and then changes and reverses the direction and so on.
For an 8 Shaft Loom you can extend the pattern as shown below.
 Threading for 8 Shaft Loom Sampler Pattern
This time you've got 8 rows representing each of the 8 shafts for the loom.
For our Sampler today we are focusing on just using 4 shafts, so if you have an 8 shaft loom you can just warp up the front 4 shafts for this.
The final thing you need to know how to read for weaving with a table loom is a pattern draft which can also be known as a lift plan.
These are written vertically and this time the columns relate to the shaft to be used and a row is one pick/row of weft yarn placed between the warp yarns.
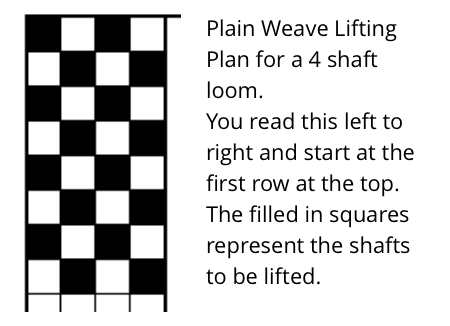
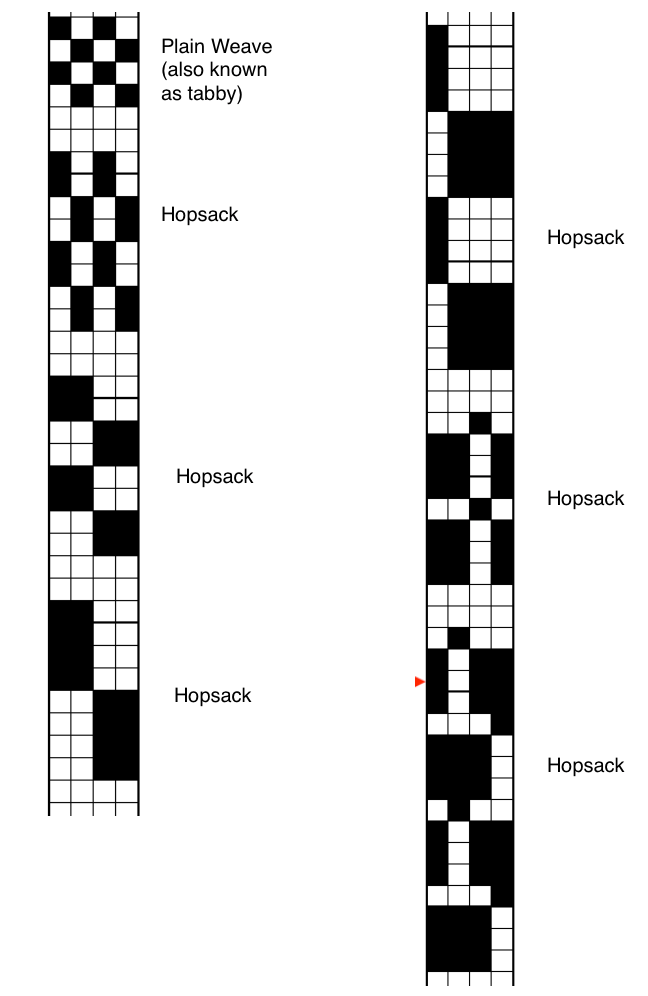
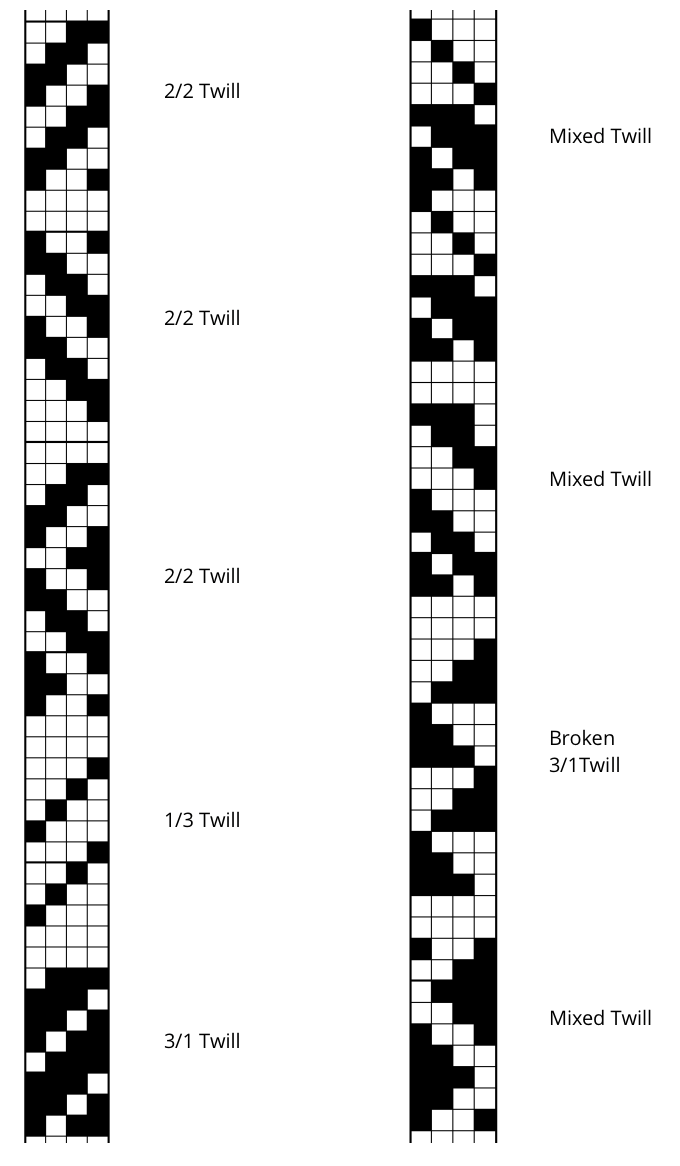
In the diagram above in the first row you are lifting up shafts 1 and 3 which are the coloured in squares. The next row down you are lifting shafts 2 and 4 and so on. This creates a plain weave pattern of alternating shafts lifting up their threads.
Changing which shafts are lifted changes the pattern and this is what we will be doing with our Sampler pattern.
Table Looms are Fun Sampler
Loom: 4 shaft or 8 shaft table loom (just use the first 4 shafts on your loom)
Sett: 10dpi
Reed: 40/10 (10dpi) threading one warp thread through one dent/slot on your reed
Yarn: Ashford Tekapo 8ply in contrasting colours or Millburn DK by Millburn DK by Eden Cottage Yarns in 2 contrasting colours. You will need 100g of each colour.
Weaving Width in Reed: 20cm/8"
Warp Length: 3m/3.3 yards
Total Number of Warp Threads: 83
Warping Instructions: Thread the heddles following the threading plan below
Weaving Instructions: Using the following lift plans weave using either of your warp colours to create patterns. The individual patterns can be repeated as many times as you like and you can also combine them with other patterns too. You can reverse the patterns as well. Basically, play with the patterns and have fun.
Finishing: Once you have finished your cloth cut it from the loom and hand wash in warm water. Spin or squeeze out the excess water. Iron your cloth whilst damp
Once your cloth is dried you can admire your weaving creativity in playing with patterns. You could use it as a wall hanging, table runner, or stitch it into a bag.
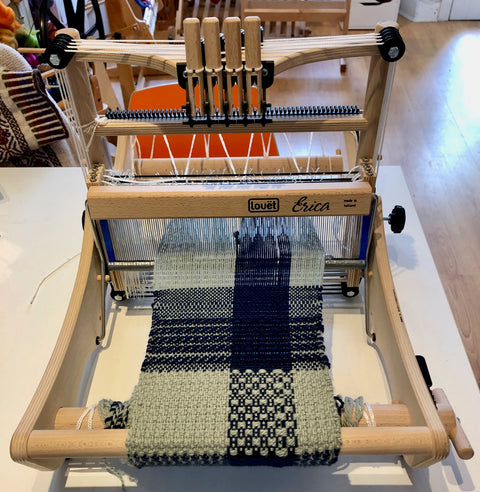
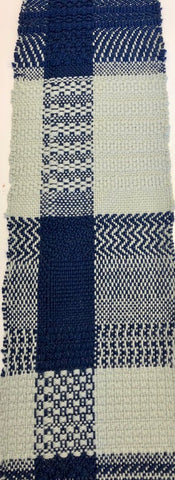
This sampler is what part of what I use for teaching our table loom class and Rob had the pleasure of taking part in this class earlier this year using our Erica table loom and here's what he created. He used Ashford Tekapo 8ply in the colour Sage (23) and Midnight Blue (30) which give a really good contrast.
Front of the Cloth of Rob's Sampler
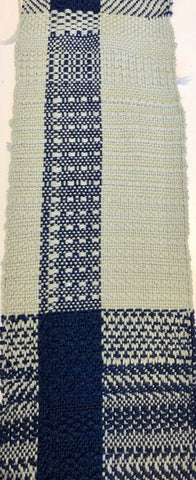

Back of the Cloth of Rob's Sampler
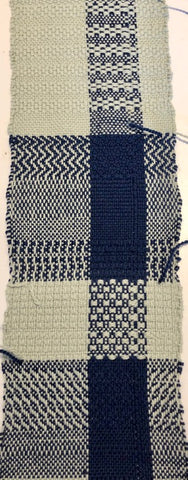
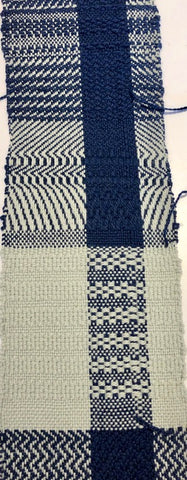
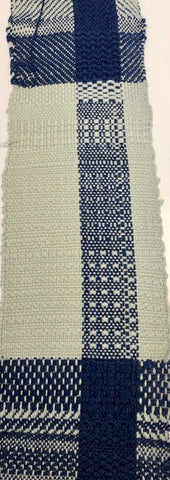
As you can see there are differences between the front and back of the cloth depending on the patterns used. This can sometimes mean that you prefer the back of your cloth more than the front, which is completely fine and it's why when taking the cloth off your loom is alway fun as you get to see something you might not have expected.
Rob and I hope that this inspires you to give a table loom a go and have a play at mixing up patterns to create your own unique cloth.
If you need any help with table looms or weaving then you can always contact us and we will do our best to help.