Welcome to our first free weaving pattern blog post at Weft Blown!
As a weaving teacher I've been wanting to create a series of patterns for people to weave in the comfort of their own home. So this will be the first pattern in this new series.
One of the reasons for writing patterns is that a common issue that crops up with my students is that many of them are scared of choosing colours for weaving with to get well defined stripe patterns.
Weaving with different colours of yarn is a bit different to knitting or crocheting with different yarn colours. In weave you notice a lot more the difference in contrast between colours. Sometimes you think that 2 yarn colours will look great together, but then when they're woven up they blend in together and become a bit mushy. This happened to me quite a few times when I started weaving and it wasn't until I learned about contrast in the yarns makes a difference that things changed.
The easiest way to work this out is to use a camera and use the black and white setting on it. If you place the yarns you want to use side by side and either look at it on the screen in black and white or take and photo and convert it to black and white you'll instantly see how different one is from the other.
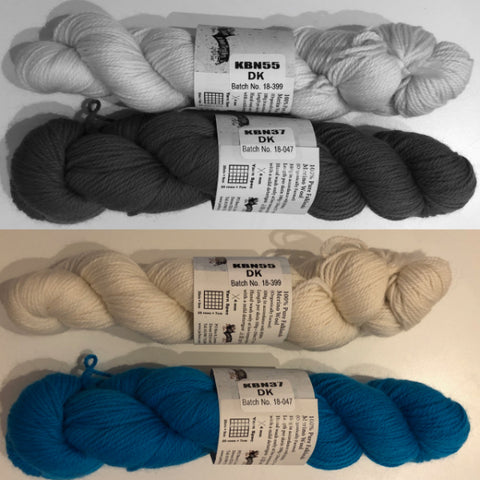
As you can see in the image above the white and the blue have a quite distinct tonal difference between each other in black and white so would work well together.
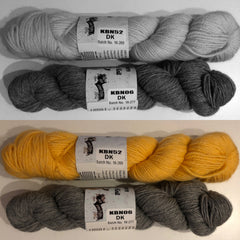
The Navy and Yellow and the Yellow and Grey yarn combinations also have quite a big tonal difference too and would be great.
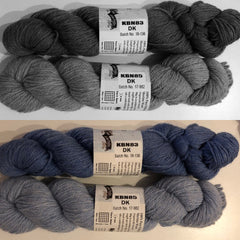
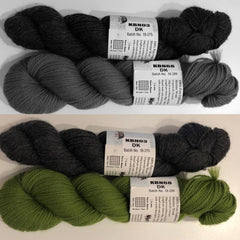
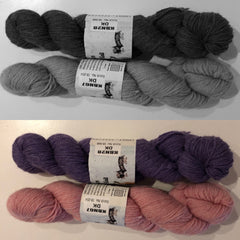
These 3 yarn combinations have a more subtle tonal difference but again would work well together.
You can use this method with any yarns at all in your stash and it's even easy to use when out yarn shopping as just quickly grab your camera, put them together and see how they work.
With all of this in mind I thought that the first pattern I would create would use the first combination of the blue and white yarns to create a scarf based on the stunning summer Cornish Skies from our summer holiday. It also reminds me of our visit to John Arbon's Mill in Devon when we were there too, where the yarn comes from.
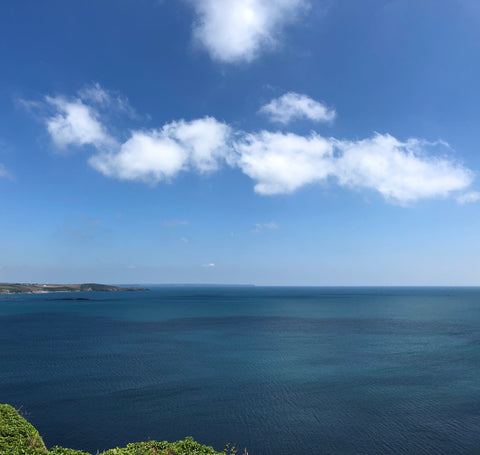
This is the view from St Michael's Mount on the far southwest of Cornwall looking out to the English Channel. It was a gorgeous hot summers day and I love the little Cumulus clouds against the deep blue sky.
I wove the pattern using our 15" Schacht Cricket Rigid Heddle Loom but it can be woven on any rigid heddle loom that is at least 10" wide.
Below are the instructions for how to weave the scarf:
Yarn: John Arbon Knit by Numbers DK in 1x100g skein in KBN 37 Blue and 1x100g skein in KBN 55 Natural. We now have kits with the yarn for this pattern.
Reed: Schacht 8dpi Rigid Heddle Reed (The Ashford 7.5 dpi reed will be fine for Ashford Rigid Heddle Looms)
Weaving width in Reed: 25cm/10"
Warp Length: 2.5m/8'2"
Total Number of Warp Threads (also known as warp ends): 78
Warping Instructions: Thread your loom in the following colour order with the number being a single warp thread
Blue: 16 - 6 - 8 - 18
White: - 4 - 14 - 12 -
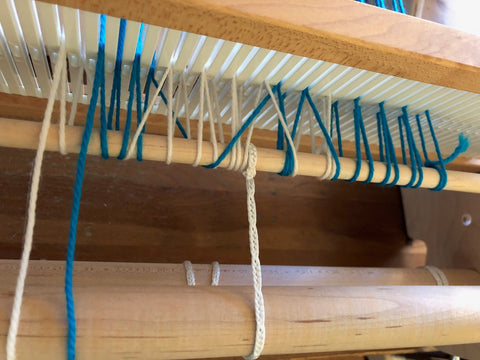
To change colours in your warp you can knot off one colour and then start another colour, or you can carry them along the back as shown below.
Weaving Instructions: The weft stripes can be as big or as narrow as you want them to be. What I did was to wind some yarn onto the shuttle, weave what was on the shuttle and then wind some of the next colour on. I know this is not very mathematical but if you did want to be mathematical you could follow the warp colour pattern in the weft, or just weave what you feel. Remember that this is your scarf that you are weaving so feel free to make it your own. I did stop and start with the blue colour. There should be enough yarn for you to use both colours in the weft.
Do make sure that you are not beating too hard and also that you start the next colour to the opposite side of where you finished the last colour, as shown below.
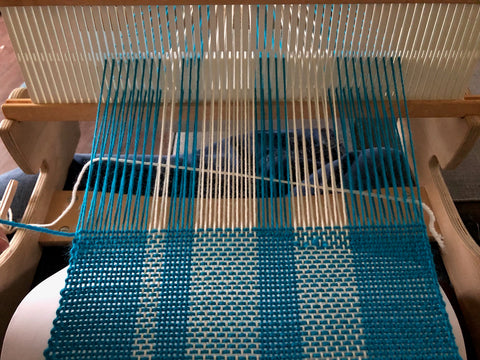
The blue colour was finished at the left hand side and the white was then started on the right hand side. This way when you tuck in the ends of the yarn they will not cause a bump on one side as they are away from each other.
Also, do notice how balanced the weave looks in the photo. A common mistake for new weavers is to beat too hard on the cloth and not leave enough space for the warp yarn to be seen. Don't worry about seeing little gaps in the cloth when weaving as you need to remember the warp yarn is under tension and when released will loosen up and start to fill in the gaps. Once it's washed it will full up a bit as well and become nice and balanced.
Finishing your cloth: Once you've finished weaving you can cut the cloth from your loom and either knot your fringes or twist them and knot them. Then wash your cloth in a sink of hot water with wool wash and leave for at least half an hour. Rinse if needed and then remove from the sink and either roll it up in a towel to get rid of the excess water or put on the lowest spin setting on your washing machine. Then iron your scarf whilst it's wet and then lay flat to dry.
Finished Size after washing: 20cm/8" wide by 2m/6'7" long excluding fringes
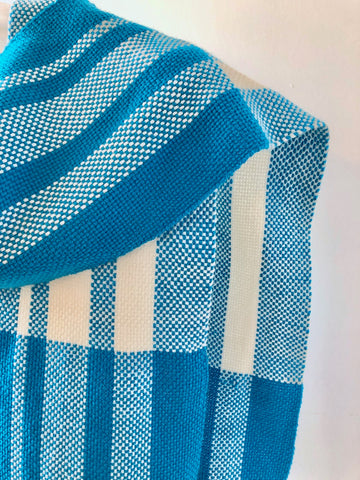
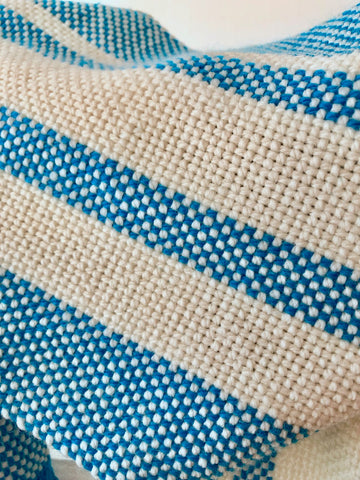
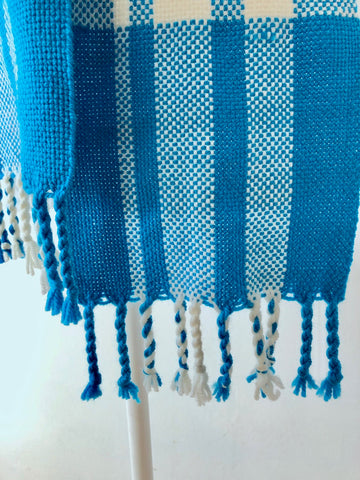
I chose to do wide weft stripes in my scarf and really liked how it turned out.
This scarf can be woven with any colour combination and you could use the colour pairings at the beginning of this post or create your own from your stash.
Any DK weight yarn will work for this pattern and you will need 100g of each colour to weave with.
I hope you enjoy this pattern and I would love to see your own versions of it so I have started a thread on our Weft Blown Ravelry group where you can share your weaving and is a good place to ask any questions you have about the pattern.
Also please do share images of it on Instagram using #cornishskieswb or post to our Facebook group.
I will be back soon with our next pattern which will be using Eden Cottage Milburn DK yarn.
Thanks
Ange at Weft Blown
(This pattern is for personal use only and not to be used for commercial purposes)
